Printables.com
"Waves" Designer Lamp
🏭 100+ tiskáren
·
po celé ČR
·
⏱ platba po přijetí tiskárnou
Autor modelu: JH
·
originál na Printables.com
Popis
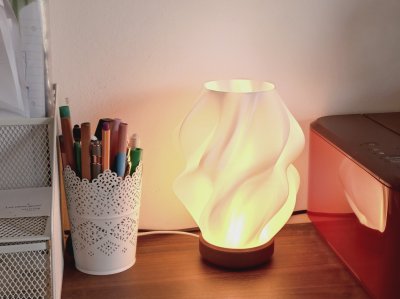
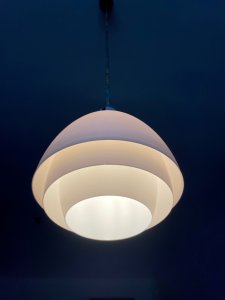
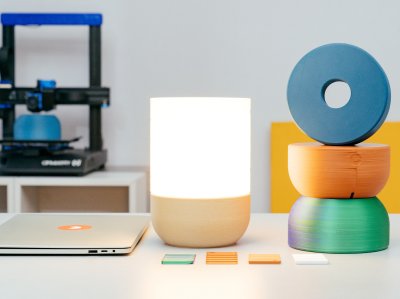
Designer-Esque fully 3D-printable Vasemode Lamp Design
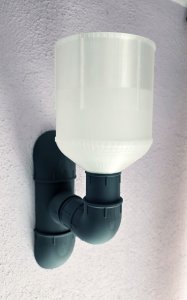
The Lampshade and the base thread into each other for a seamless and sturdy appearance. Although it is designed to fit the Bambu Labs "LED Lamp Kit" you can easily modify the Base to fit any light source (details see below).
Printing Instructions (settings already implemented in .3mf files)
Lampshade:
The first 6mm of the Lampshade is the part that screws into the base and therefore is designed to be printed solid (achieved by enabling solid bottom layers). From there on upwards is the actual Lampshade that is ideally printed with Vasemode. For these settings proceed as followed:
• Select preferred layer height (0.2mm recommended - as seen in pictures)
• Enable Vase Mode
• Set External Perimeter Extrusion Width to 0.6mm
• Set solid bottom layers for the first 6mm
• 0.10mm layer height = 60 solid bottom layers (59 if first layer is still 0.2mm)
• 0.15mm layer height = 40 solid bottom layers
• 0.20mm layer height = 30 solid bottom layers
• 0.24mm layer height = 25 solid bottom layers
• 0.30mm layer height = 20 solid bottom layers
Base:
• 0.2mm layerheight
• 10% rectilinear infill
• 2 Perimeters
• As seen in Pictures: Fuzzyskin for the most outer cylinder to 0.3 thickness and 0.4 point distance
Assembly Instructions (Bambu Labs LED Lamp Kit)
• Remove any debris from the bottom 3 holes of the base and glue the feet into place (e.g. with superglue).
• While waiting for the glue to set check the threads of the Base for any imperfections and remove those (e.g. with a sharp knife).
• Disassemble the LED light source from the Bambu Labs LED Lamp Kit by unscrewing the two metal body halves counterclockwise.
• Attach the bottom part of the LED light source to the base with the included screws or double sided tape.
• Screw the top half of the LED light source back again onto the bottom half that is now attached to the base from step 4.
• Carefully screw the lampshade into the base. If it has too much resistance, check again for any debris on the threads. Also make sure to align the lampshade perfectly vertical with the base.
Customization Instructions
Under "Files" you will find a folder named "Customisable STEP files". In there are files for customizing the base and also for customizing almost any Lampshade design to fit the base:
"Base RAW"
This is a solidified Base version containing just the threads for attaching the Lampshade. You can load this into your preferred CAD program and modify the inner parts (marked green) to fit your desired light source (like an E14/E27 socket or else).
DO NOT modify the threads, the inner lip or the area in between those as marked red in the picture to the right! Otherwise the Lampshade wont screw in properly anymore.
"Base for 'Bambu Lab LED Lamp Kit'"
This is the STEP file to the Base design fitting the Bambu Lab LED Lamp Kit light source. in case you do not like the appearance of this Base but still want to use Bambus LED Kit, you can modify the whole look on the "outside" as long as you do not change anything of the inside as marked red in the picture to the right.
Especially DO NOT modify anything regarding the threads or the inner lip (markes red), since this will lead to the Lampshade not fitting anymore.
"Lampshade-Attachment"
This is the heart of the design, since it is that part of Lampshade that screws into the base. You can use it to modify other existing lampshade designs that you like to fit with this base, glue onto other stuff that you have at home that you want to use as a lamp shade or even to design your own unique lampshades and make them compatible with this (or even your own modified) base. As you can see in Picture, the only requirement for the other Lampshade is a width of 83mm at the bottom. Generally this can be achieved by just scaling the digital files to the right dimensions. If it is wider or not round, you might have to add supports for the overlapping parts. The inside will not need any supports, because at the height where your lampshade starts, it will print with vasemode so it just builds on top of the outer rim. For reference just check the Lampshade STL, that is also just a solid body upwards from the Attachment.
Podobné modely
od 690 Kč
od 400 Kč