Printables.com
Phone Stand - Industrial
🏭 100+ tiskáren
·
across Czechia
·
⏱ pay after printer accepts
Model author: Josh-3d
·
original on Printables.com
Description
Intro
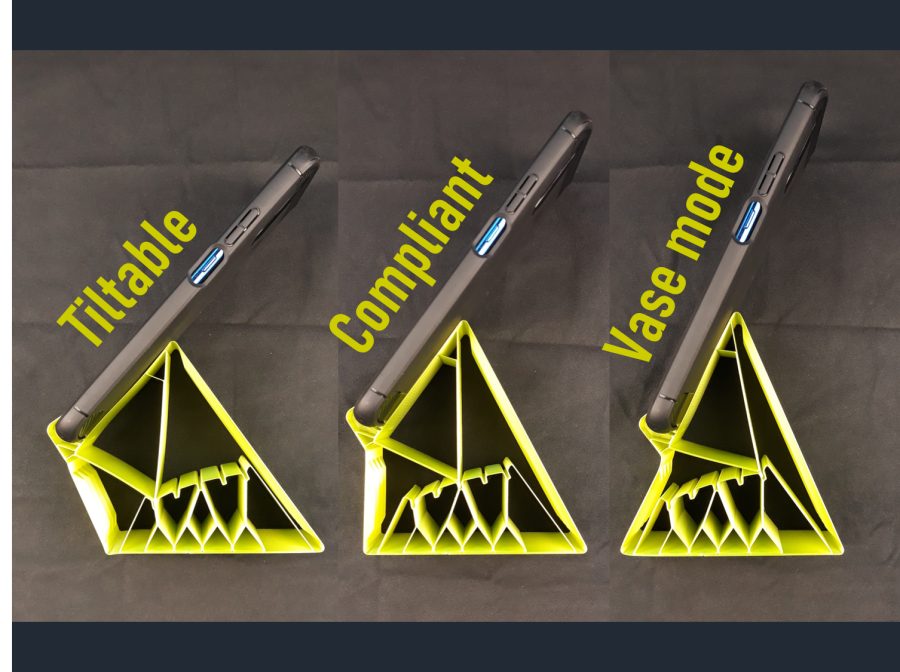
I have originally setup a Bambu Studio project file that has everything laid out, however, if you're not using Bambu Studio or it's printers, please refer to this image for layout, printing orientation, number of parts needed, etc.
The Main Stand
Model
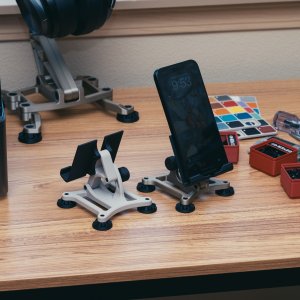
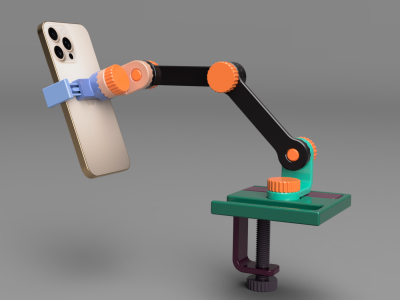
A phone stand to go along with the Headphone stand I made! A few people had suggested this, so figured why not?
Model is featured in Bambu PLA Matte Charcoal, and Bambu Iridium Gold Metallic for the main print. For the second print, it is featured in Bambu Charcoal and Polymaker Muted White.
[Tools & Assembly]
Like the Headphone stand, the cell phone stand is pretty easy. You'll need the following hardware and tools.
I designed this to use M3 socket cap screws.
Hardware Needed:
M3x12 - 4 (used for the feet)
M3x25 - 3 (Used to connect the swing arm to the stand, and the phone holder to the swing arm)
M3x30 - 1 (Used for the knob for the swing arm)
M3xNuts x 9 (The knob makes use of two nuts!)
Tools Needed:
Hex Driver
Drill bit for clearing holes
Start by drilling out the holes in the feet and knob. These holes were partially blocked to get a cleaner print. All the other holes should be sized that a M3 screw can fit through without being too tight, but things like variation in filament properties might make the holes tight, so if you can't freely push a screw through the holes in the frame, clear them out with an appropriately sized drill too.
Next, Prepare the knob! We'll feed a M3x30 screw through the hole and through a nut that'll be embedded on the other side of the knob. Tighten it down!
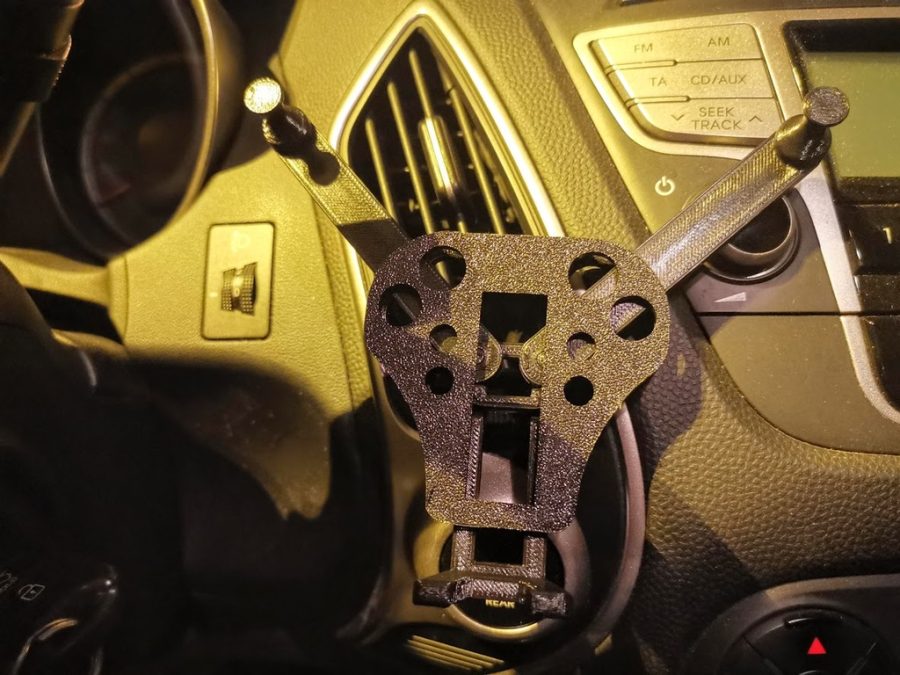
Now we'll assemble the main frame! There's embedded slots for all of the M3 nuts, so go ahead and prepare by putting all the nuts in place. Next, we'll install the feet, as once the holder and swing arm are on, it can obstruct access to the screws for the front feet. Use M3x12 screws for the feet! For the swing arm, attach the two phone holder sides using M3x25 screws. Attach the arm to the base using a M3x25mm screw, but make sure not to over tighten it as we don't want the hing to be too stiff! Lastly, install the knob through the guide and swing arm and tighten it down!
-------
If you like my work, consider showing your love by Buying me a coffee. Additionally, if you're looking to sell prints of my design, please check out my Patreon page for more information. on.
Similar models
from 110 Kč
3D print

from 250 Kč

from 70 Kč
from 400 Kč