Printables.com
Lithophane Tutorial and Calibration Toolkit
🏭 100+ tiskáren
·
across Czechia
·
⏱ quotes in 24 h
Model author: quattro
·
original on Printables.com
Description
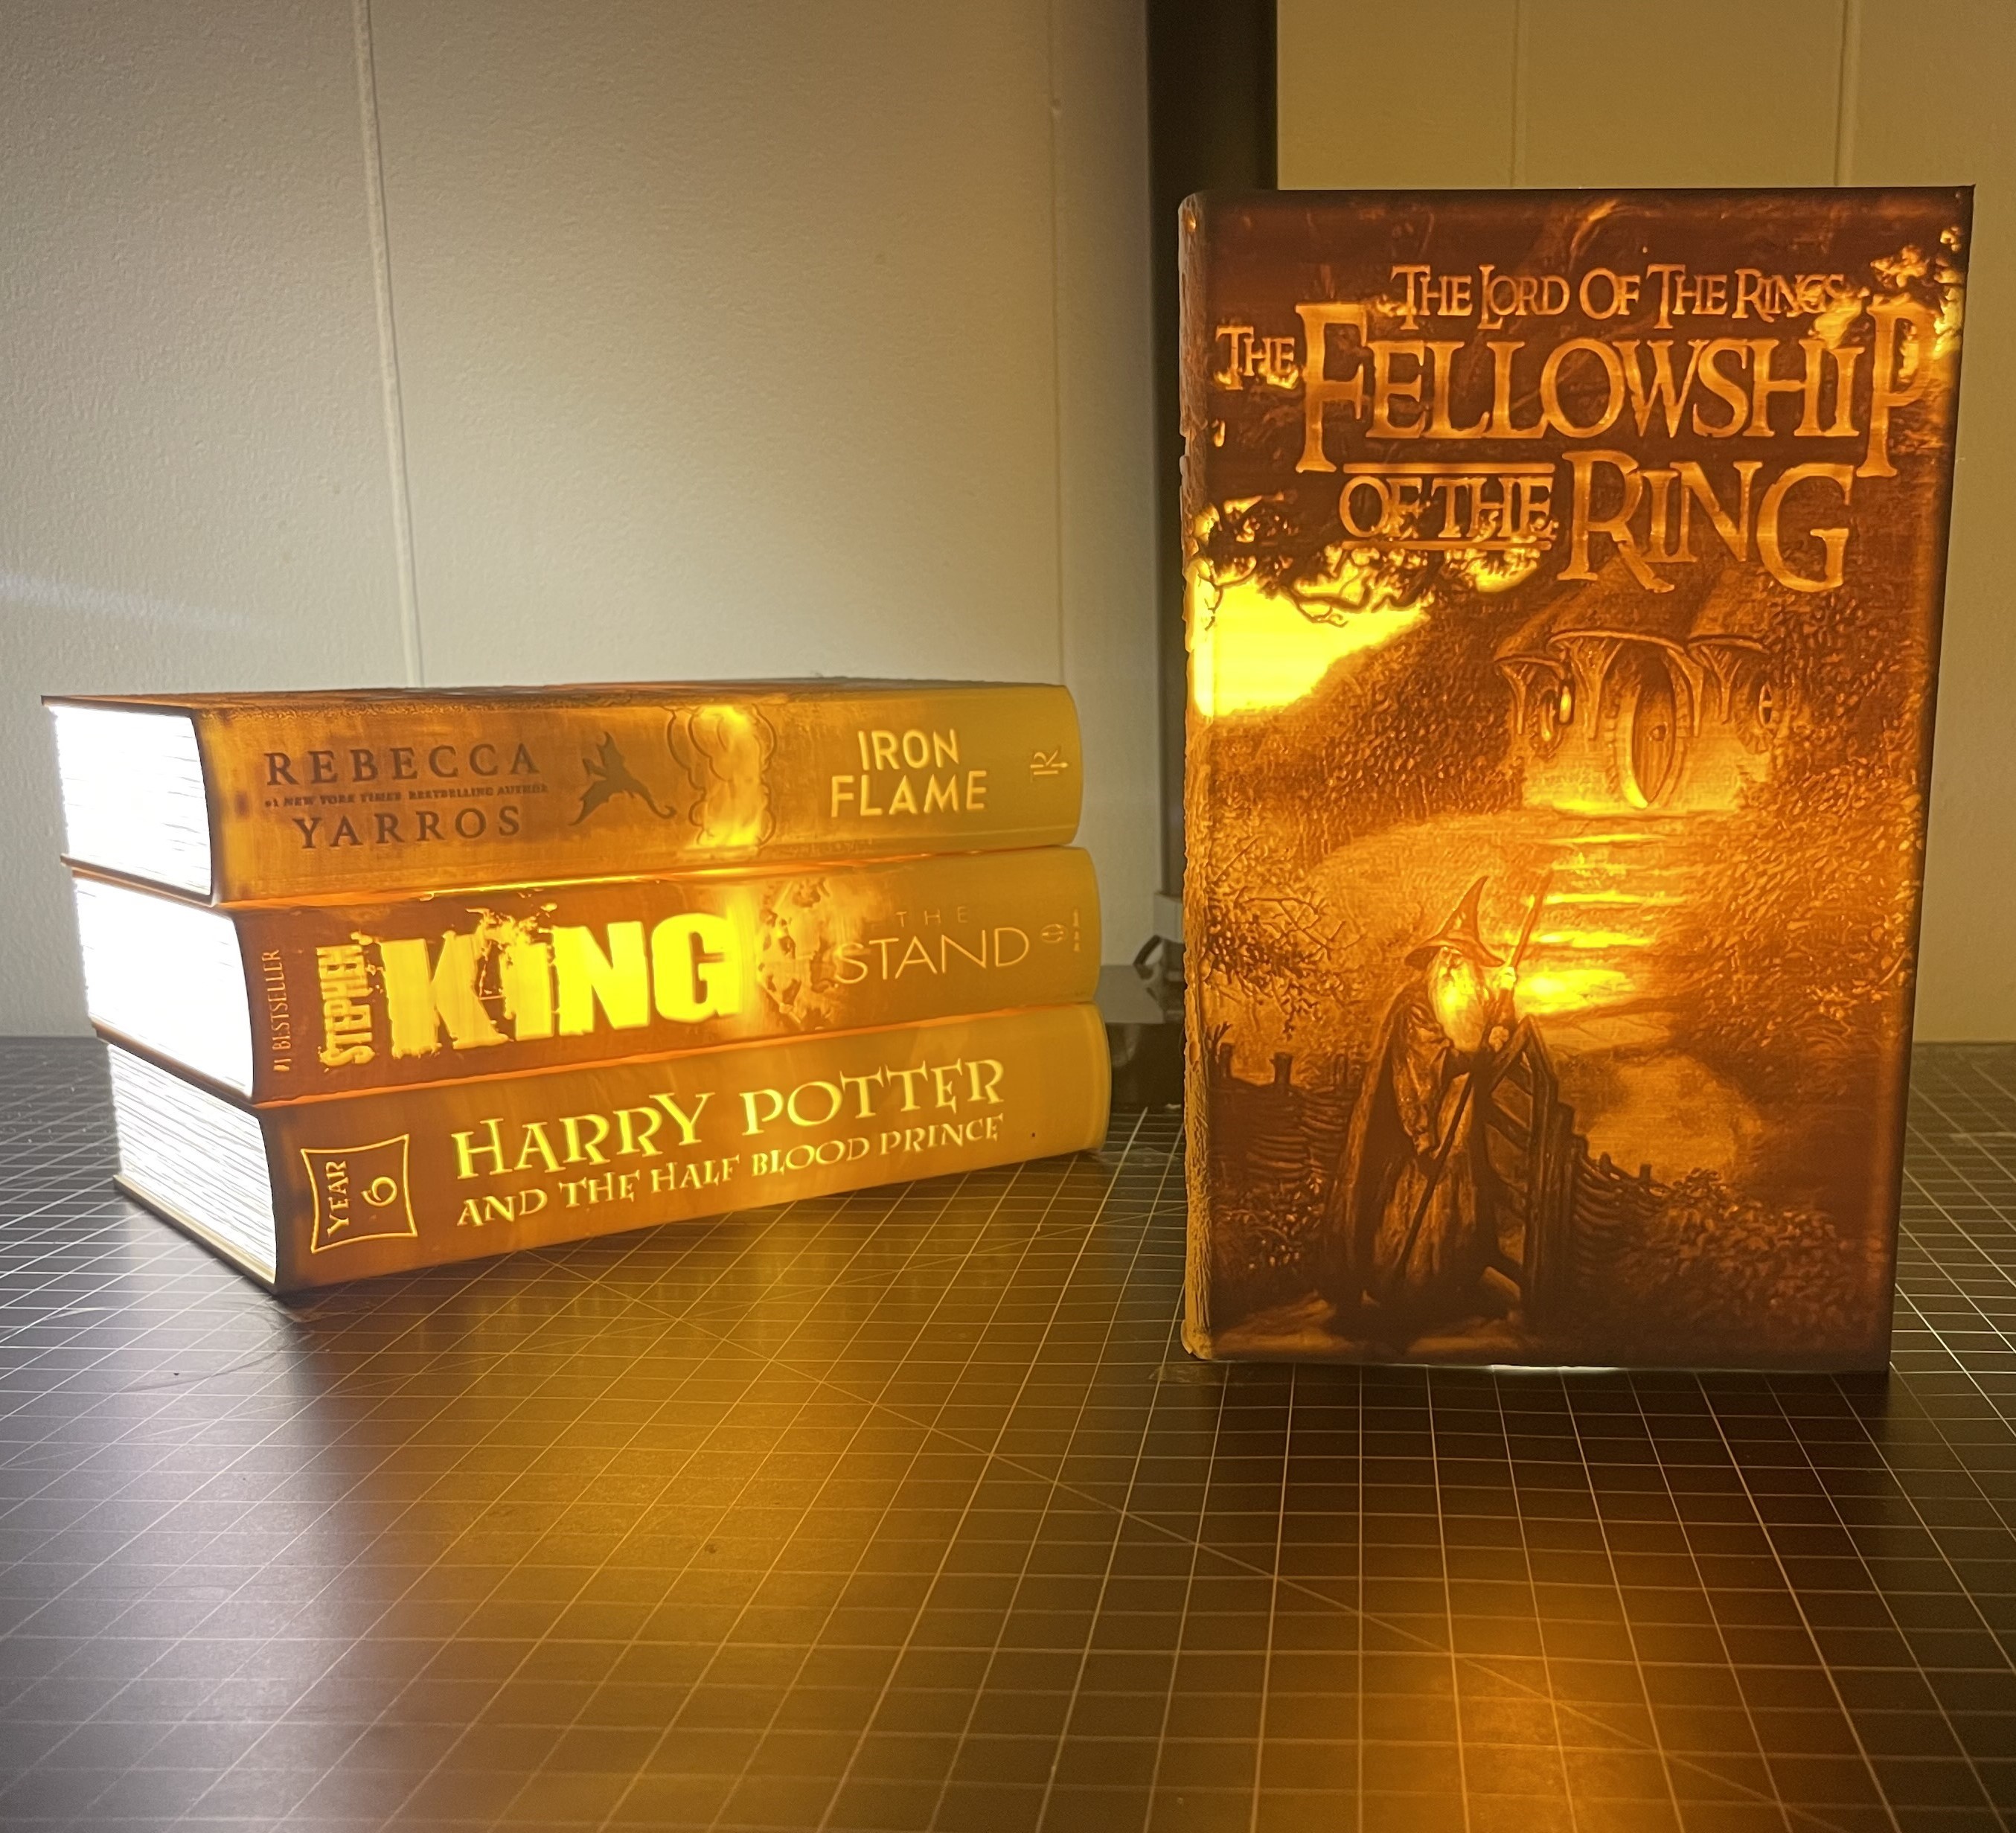
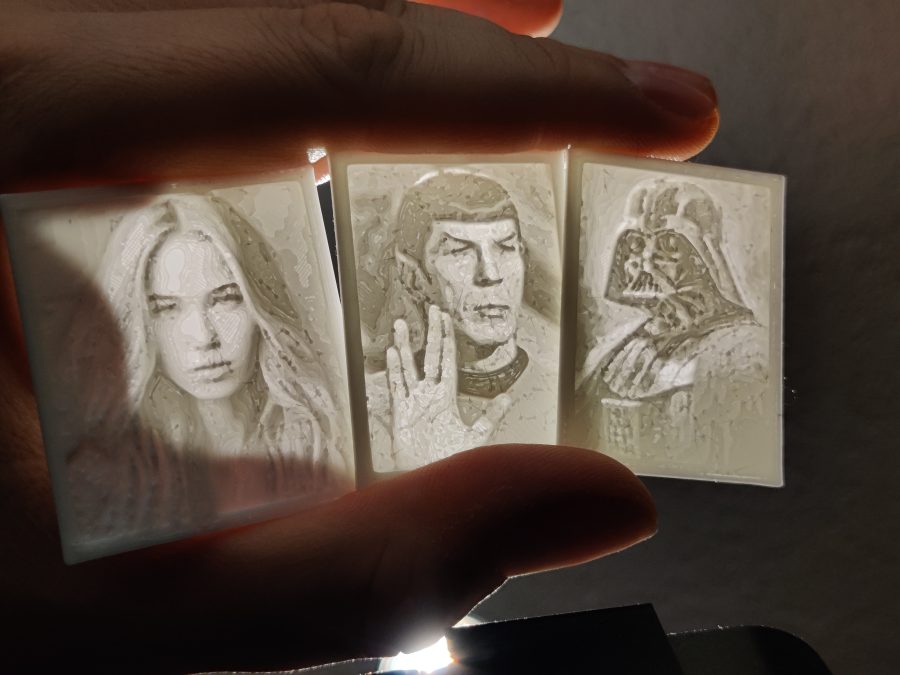
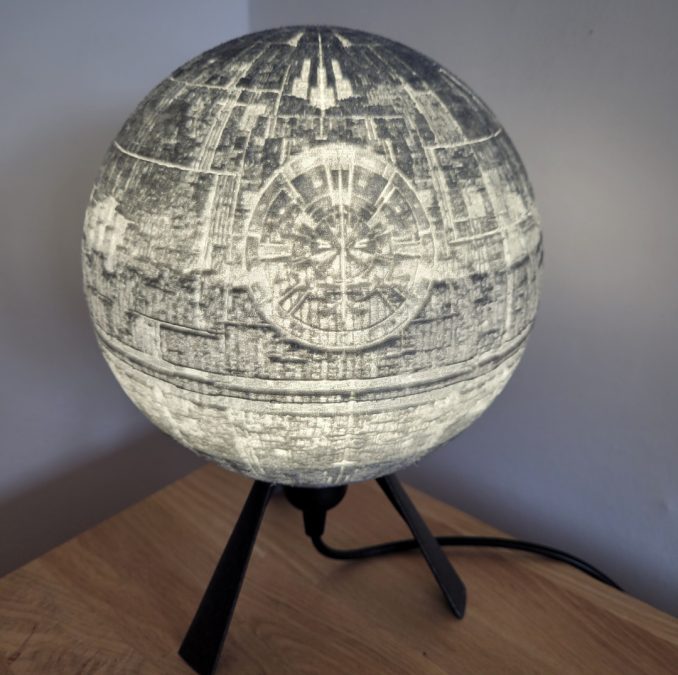
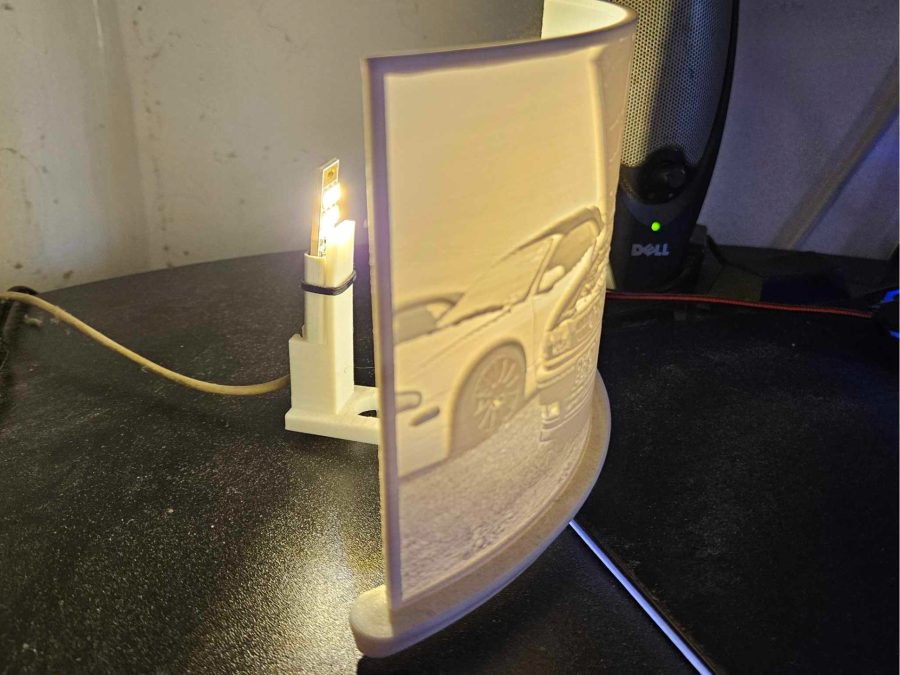
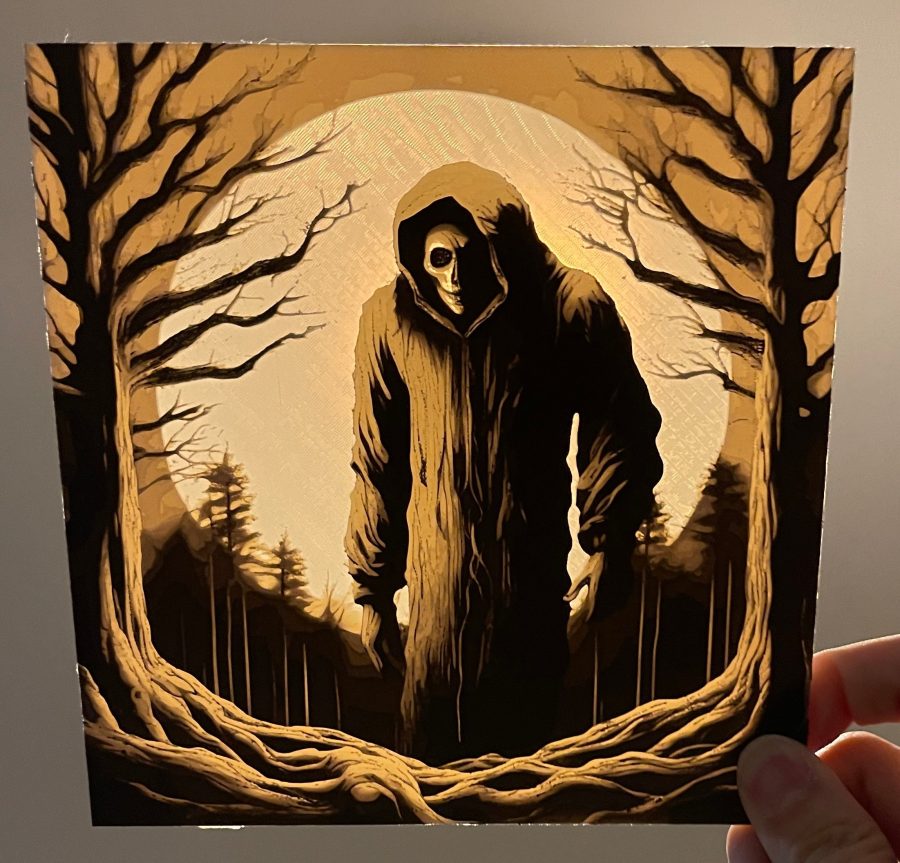
Imagine walking into a UV lit location wearing a picture of Darth Vader or Spock around your neck! It will immediately light up and will show everyone that the Force in fact is with you or you find something fascinating while raising an eyebrow.I have included these two designs in the examples. For this isn't just a model of two pendants. This is a tutorial and a toolkit to make your own with any suitable picture. The fun doesn't stop there, ever heard of a lithophane and wished there was one of your favorite picture? Loved one, pet, car or maybe a landscape? Perfect gift for Christmas btw.Look no further!Know your FilamentFirst of all you should know what your filament is capable of. For this purpose I have made some filament testers. There are 2 variants:True lithophaneThis one features a wide frame to allow for a better judgement against a bright light.White on black imageThis has a base of black filament to act as a proper background.TestingJust print a fitting tester with the filament(s) you are going to use and find out what it is capable of.The tester has numbers on it, those are the layers of filament printed of top of each other. For obvious reasons 100% infill is required.As long as a difference between the segments is visible this layer height can be used. So, if you can see a difference between 7 and 8 but 8, 9 and 10 all look the same, this means: You can use up to 8 layers. Using 9 layers or more will not further increase the dynamic range of the resulting image.I have included a tester for lithophane (with frame) and for pictures. Also, there is one extended tester for lithophanes with 20 segments. They are designed for 0.15mm layer height.Additionally there are versions for 0.10mm layer height.As this is open source, you can create your own tester with the Filament_Tester.scad file in OpenSCAD.Configuring your filament test part (Optional)If you have used OpenSCAD before, please skip the next two paragraphs!OpenSCAD is like a programming language for CAD. Designs are done by writing text. No worries, you don't have to write a single line of code. I did that for you! What you are going to use is the customizer seen on the right on the screenshot below. Go ahead and open the Filament_Tester.scad file in OpenSCAD. The customizer on the right presents you with some options that influence the design. It will update automatically. Try it out! You can always go back to the defaults.Once you are satisfied, click the render-button, marked in yellow in the screenshot below and once it is done, click the Export-STL button, marked in pink.That's it! You have successfully used OpenSCAD!Description of the fields:base: Print a background for white on black printsframe: print a wide frame around the tester to better see the test fieldsfirst layer height and layer height: According to your printer's capabilities. lower layer height result in more available shades.segments: Number of segments to print. Usually 10 is good. Dedicated lithophane filaments and low layer heights may be capable to pull off 20 shades.Prepare the ImageSo you have your filament all dialed in? Let's get the actual image ready.This step is the same regardless if you want to make a true lithophane or a 3d-printed opaque image.Convert to GrayscaleMost pictures come in pretty colors these days but we will not use those. You can just click on “convert to grayscale” on any image manipulation software but there are better ways.Color images consists (in general) of 3 colors: red, green and blue. Using only one of these may actually result in a way better grayscale image than using all of them combined. For faces, the green channel usually looks nice.In GIMP, this can be done by selecting “Colors → Components → Extract Component” which brings us this screen:Next we are going to max out the dynamic range. This is important because we have only a very limited dynamic range in a lithophane and dynamic range wasted in the source picture will result in a dull result.Again, go into “Colors” then “Curves…”.Compress all those bright but not really full white low spikes (marked) in the histogram into a full white by dragging the white point to the left. You also may want to pull the middle ranges up a little bit to get a nice dynamic picture that looks slightly overexposed.Finally we (in most cases) need to scale the image down so OpenSCAD will not eat all your Random Access Memory. With 16 GiB of RAM, a maximum of 300x300 Pixel should be observed.In GIMP, this is in “Image → Scale Image…”Export the resulting image and move to the next chapter.Generating the STL File in OpenSCADWe are now converting a 2D image to generate a 3D model.OpenSCAD can do this but it requires some work. Luckily I came up with a tool to make it really easy. Here is a screenshot of the Customizer. I'll explain what is does down below.GeneralFor a true lithophane, check the invert checkbox. It ensures that the resulting 3D model is a negat
Similar models


from 270 Kč