Unknown source
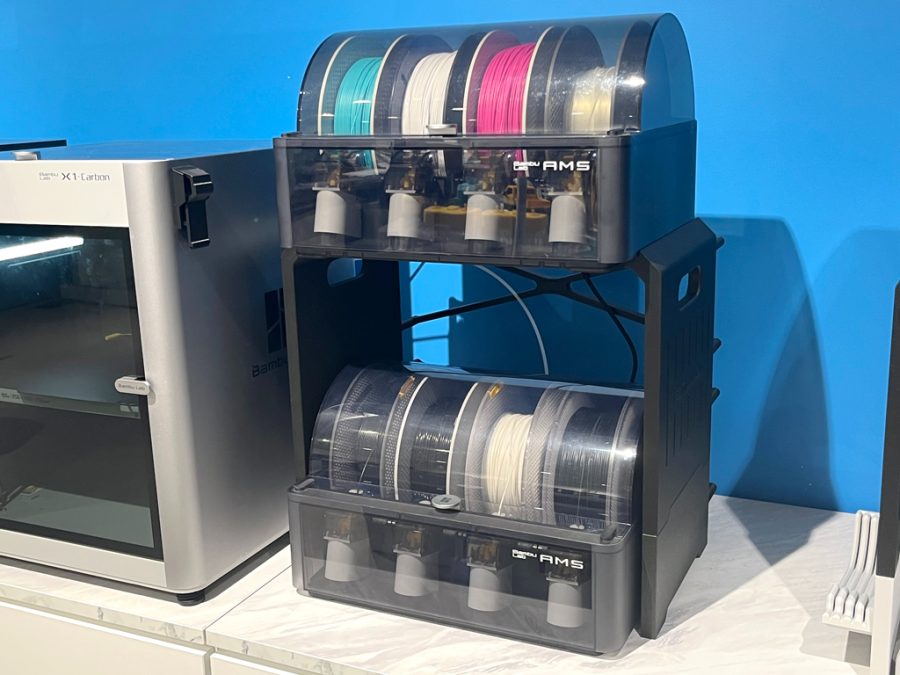
AMS Stacking Stand V3
🏭 100+ tiskáren
·
across Czechia
·
⏱ pay after printer accepts
Description
※ Oct. 6th, 2025 / AMS 2 Pro version has been published seperately.
https://makerworld.com/models/1861875
※ The horizontal width of the bracing for the AMS 2 Pro is 3mm longer. You can simply print only the bracing parts(Plate 2) from the link above and use them for AMS 2 Pro.
----------------------------------------
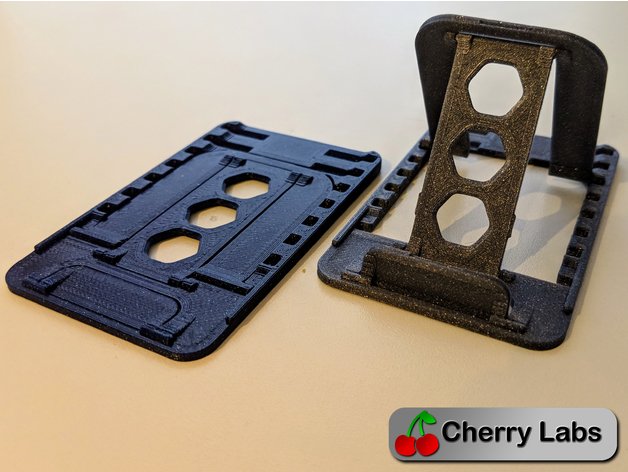
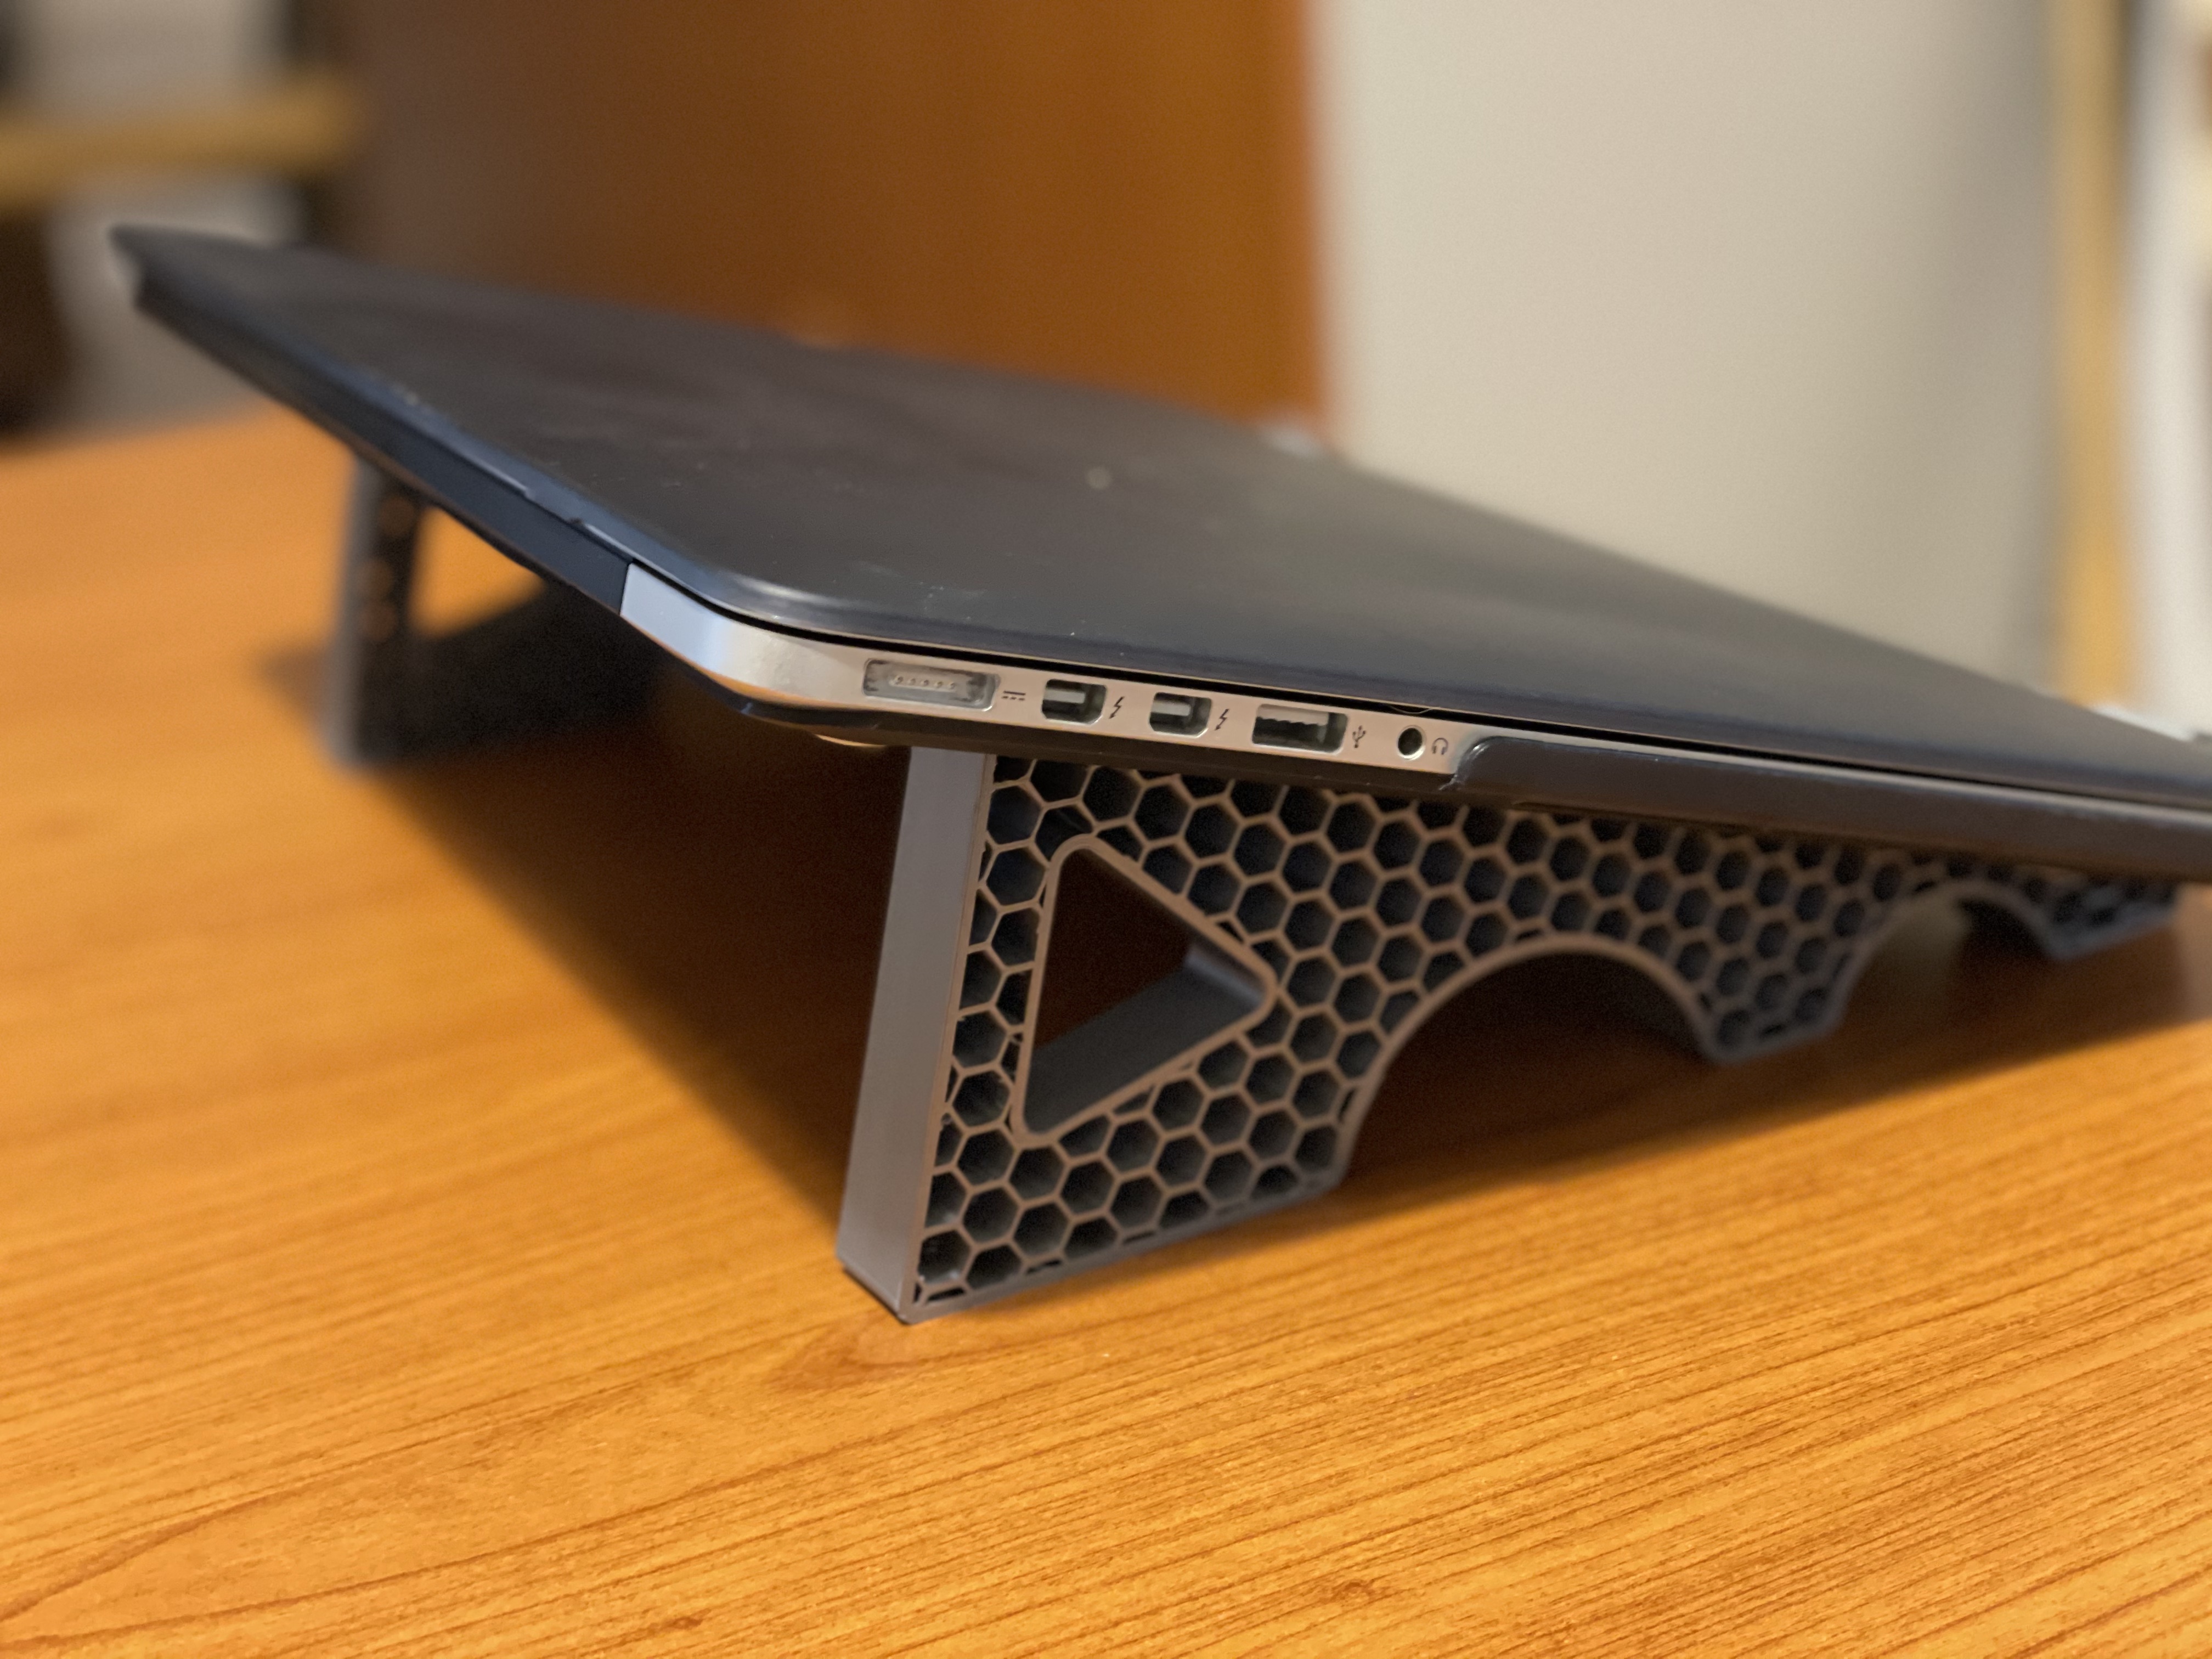
This is an AMS Stacking Stand with Bambu Lab P1P Armor Modplate style.
All gaps for assembly are intentionally very small. If it's difficult, please use a tool like a rubber mallet.
If you need a Build Plate Holder addition, please check the link below.
https://makerworld.com/models/62232
Also, if you're looking to use the AMS HT as well, you might want to check out the AMS-HT / Shelf Add-on designed by SigOS.
https://makerworld.com/models/2134937
Updated on Oct. 7th, 2025
- The overall design has been updated to V3.
- When assembling the side panels and extensions, no separate pins are needed anymore.
- The height of the extension panel has also been increased by 10 mm, allowing the lower AMS lid to open more fully.
- The previous data has been archived, so if needed, please download the Archive_251007.zip file.
How to assemble
[ Instruction for Archived version ]
----------------------------------------
Updated on Jan. 7th, 2024
- The wall extension(Riser) is 20mm taller than the previous one, so the lower AMS top lid can fully open without the need to hold it.
- Also, you can add one more bracing when you use the wall extension for more rigidity.
Pins are separate parts because they need more strength, so at least 50% infill and 4 wall loops are recommended.
* If you want to push the lower AMS further back, please use Pin4 v2 & Pin4-Spacer instead of Pin3 v2.
* All pins are redesigned for better strength. Thanks for the great idea! @djwhouse Now, pins can be printed horizontally.
• Pin1 v2(13mm) & Lock : for assembling bracing parts.
• Pin2 v2(40mm) : for adding side wall extensions.
• *Pin3 v2(20mm) : for joining bracing assembly and side walls.
• *Pin4 v2(50mm) & *Pin4-Spacer : (Deeper) for joining bracing assembly and side walls.
Similar models
from 170 Kč

Request quote